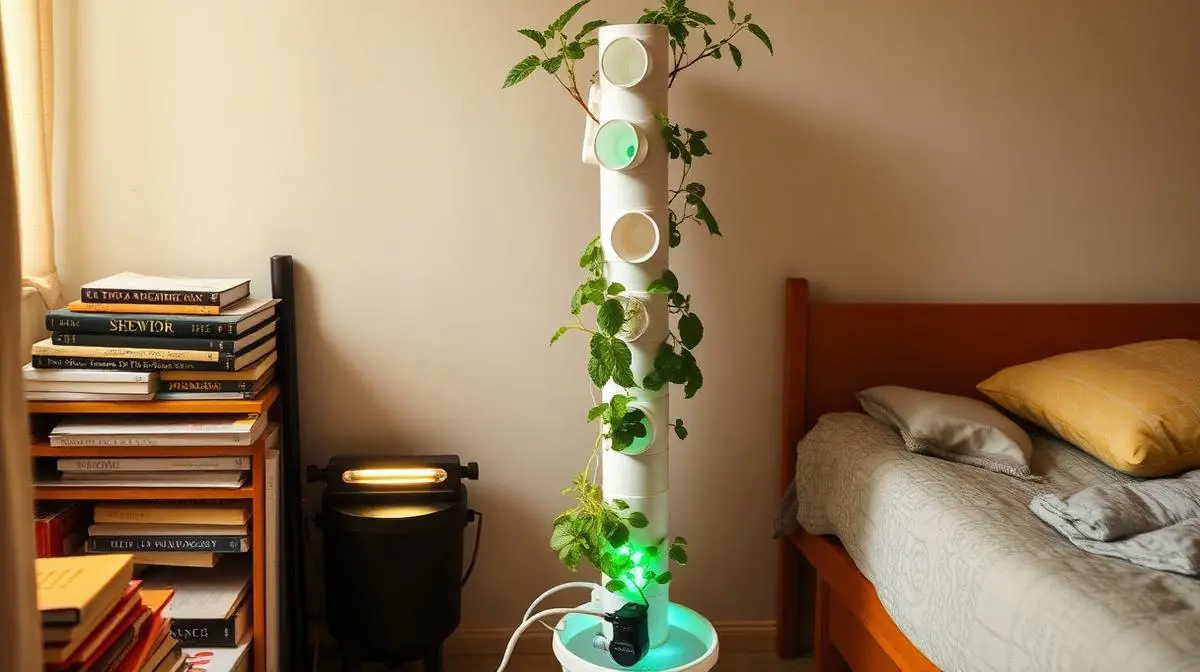
Alright so I might have gone too far this time.
You know how it starts — you grow a couple of plants, feel good about yourself, tell everyone “yaar it’s so easy,” and then suddenly you’re watching YouTube videos at 2am about vertical farming and ordering PVC pipes from Amazon at 3am. That’s basically what happened.
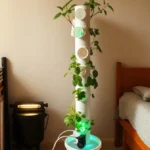
I built a vertical hydroponic tower. In my room. Like, my actual bedroom where I sleep. It’s about 4 feet tall, takes up maybe 1 square foot of floor space, and currently has 18 plants growing on it. My mom saw it on video call and said “beta, room mein jungle bana liya hai kya?”
Yes mummy. That’s exactly what I did.
Why Go Vertical When Shelves Exist?
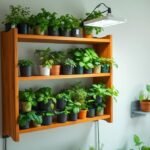
Fair question. I literally wrote a whole blog about fitting 25 plants on a shelf. And that system works great, don’t get me wrong. But the shelf has a limitation — it’s wide. It occupies wall space. And in my current room (I shifted recently, long story), I don’t have a free wall to put a shelf against.
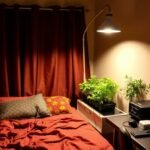
What I DO have is a corner. A tiny, awkward corner between my bed and the window where nothing fits — not a table, not a chair, not even a dustbin without it looking weird. That corner was basically dead space.
A vertical tower takes up ONE square foot. That’s it. It goes up, not out. And honestly? After doing the balcony thing, the bedroom corner setup, the budget build, and the shelf — going vertical felt like the natural next step. Literally.
How a Vertical Tower Actually Works (Simple Version)
If you’ve seen those fancy commercial tower garden systems that cost $500+, the concept is similar but my version cost… significantly less. Like, embarrassingly less.
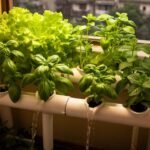
The basic idea: you stack sections of PVC pipe vertically. Each section has holes cut into it where net pots sit. At the top, a small pump pushes nutrient water up through the center. Water trickles down through the tower, feeding each plant’s roots along the way, and collects in a bucket at the bottom. Rinse and repeat. It’s basically a waterfall for plants.
The fancy term is “vertical NFT system” (Nutrient Film Technique) but honestly calling it that feels pretentious when the whole thing is built from plumbing supplies from the local hardware store. I just call it “the tower” and my roommate calls it “that thing.”
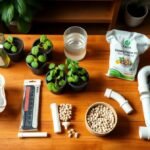
What I Used — The Full Shopping List
I went to like three different shops for this. One hardware store, one aquarium shop (for the pump), and Amazon for the small stuff. Here’s everything:
| Item | Cost (₹) |
| 4-inch PVC pipe (6 feet) | 280 |
| PVC end caps × 2 | 60 |
| Small submersible pump (18W) | 450 |
| Flexible tubing (6 feet) | 80 |
| 18 net pots (2-inch) | 90 |
| Cocopeat + LECA | 150 |
| 10L bucket (reservoir) | 60 |
| AB nutrient solution | 350 |
| Timer plug | 200 |
| Seeds | 100 |
| Miscellaneous (sealant, zip ties) | 120 |
| Total | ₹1,940 |
Under ₹2000. Again. At this point I think my budget obsession from blog #3 (I Built a Hydroponic System for Under ₹2000) has become a personality trait. But genuinely — the pump is the most expensive part, and even that’s cheaper than a pizza from Domino’s. So. Priorities.
The Build (Messy, Chaotic, Eventually Successful)
I’m not going to pretend this was smooth. It was not. But here’s roughly how it went:
Step 1: Cutting the PVC Pipe
Took the 6-foot pipe and decided to use about 4 feet of it for the actual tower (because 6 feet was hitting my ceiling fan and I’m not about that life). Cut it with a hacksaw. If you dont have a hacksaw, most hardware shops will cut it for you for like ₹20. The remaining 2 feet I kept as spare because you never know.
Step 2: Drilling the Holes
This was the hardest part honestly. Needed to cut 2-inch holes in a curved surface. I used a hole saw bit attached to a drill — borrowed from a neighbor who’s way more handy than me. Marked 18 holes in a spiral pattern going up the pipe, spaced about 6 inches apart vertically and rotated 120° each time so plants don’t block each other’s light.
The spiral pattern is important. If you just do holes in a straight line, the top plants drip water onto the ones below, and the bottom ones get zero light because the top ones shade them. Spiral = every plant gets its own “face” pointing outward. Learned this from an Epic Gardening youtube video and it’s genuinely smart.
Step 3: The Plumbing
Bottom end cap glued on with PVC cement — this seals the base. Drilled a small drain hole near the bottom connected to a short tube that leads back to the bucket. At the top, the pump tube enters through a hole in the top cap and just… drips water inside the pipe. Nothing fancy. Gravity does the rest.
I sealed every joint with aquarium-grade silicone sealant because regular sealant can leach chemicals. ₹80 tube from the aquarium shop, and it’s food-safe. Don’t skip this step unless you enjoy mopping your floor at midnight. Ask me how I know.
Step 4: Setting It Up
Placed the bucket in the corner, stood the tower inside it (the weight of water keeps it stable), connected the pump, filled the bucket with 8 litres of nutrient solution, and turned it on.
First minute: water flowing beautifully. Second minute: noticed a leak from the third hole down. Panicked. Turned off pump. Applied more sealant. Waited 2 hours for it to cure while stress-eating Maggi.
Third attempt: no leaks. We’re in business. Inserted net pots with seedlings, and honestly? It looked incredible. Like a sci-fi movie prop in my bedroom.
What’s Growing on This Tower Right Now
18 plants. Here’s the breakdown because at this point y’all know I love a breakdown:
- Top section (6 plants): Lettuce and pak choi — these get the most light from my window and the LED strip I mounted above
- Middle section (6 plants): Mint, tulsi, and coriander — the herbs that keep my kitchen running
- Bottom section (6 plants): Spring onions and methi — the troopers that don’t complain about less light
I wanted to try strawberries on the tower but honestly, strawberries need SO much light and they’re heavy when fruiting. The net pots might not hold them well. Maybe next version. For now, sticking to what works.
The mint, as always, is being mint. Growing like it’s on performance-enhancing drugs. I swear this plant has no chill. If I don’t trim it every week it’ll take over the entire tower and choke out its neighbours. It’s the overzealous group project member of the plant world.
The Pump Schedule (Don’t Run It 24/7, Trust Me)
Big difference between this tower and my previous Kratky setups — this one has a pump. Which means electricity. Which means noise. Which means figuring out a schedule that keeps plants happy without keeping me awake.
I run the pump 15 minutes on, 45 minutes off using the timer plug. This gives roots enough water without drowning them. At night (11pm to 6am), pump stays off completely. Plants don’t grow much at night anyway, and the silence is… necessary. The pump isn’t loud exactly, but it makes this low humming sound and the water trickling is like having a tiny waterfall in your room. Romantic the first night. Annoying by the third.
Electricity cost: roughly ₹50-60/month for the pump + the LED grow light I added. Less than my phone charging costs probably. Not that I’ve checked. Should I check? No. Some things are better unknown.
Where I Screwed Up
Fifth blog, still making dumb mistakes. Consistency is key, they say.
Screw-up #1: Hole size inconsistency. Some holes came out slightly bigger than others because hand-drilling on a curved surface is not an exact science. Three net pots were loose and kept slipping out. Fixed it with foam strips wrapped around the pot edges. Ugly but effective. Function over aesthetics, as they say in engineering. (They also say “measure twice, cut once” and I clearly didn’t listen to that either.)
Screw-up #2: Not considering the weight. A 4-foot PVC pipe filled with water, 18 plants, and a growing medium — it’s not light. Probably 8-10 kg when full. The first day, it tilted slightly and I had a minor heart attack. Added a simple bracket to the wall — one L-shaped metal piece, two screws. Took 5 minutes and now it’s rock solid. Should’ve planned for this from the start.
Screw-up #3: Algae in the reservoir. The bucket was transparent. Rookie move. Light + nutrients + water = algae rave. Within a week, the water was greenish. Wrapped the bucket in a black garbage bag. Problem solved in literally 30 seconds. I felt both smart and stupid simultaneously.
Screw-up #4: Splashing. The water returning to the bucket from the drain was splashing. Tiny droplets everywhere around the base. My floor was developing a permanent damp spot. Fixed it by extending the drain tube so it goes below the water surface in the bucket. No splash. Such a simple fix but took me a week of wiping my floor to figure out. Jugaad learning curve, I guess.
Tower vs Shelf — Which One’s Better?
People are going to ask this so let me just address it. Having done both:
Tower wins on: floor space (1 sqft vs 2 sqft), looks (it genuinely looks cool, like a conversation piece), and ease of scaling vertically.
Shelf wins on: simplicity (no pump needed if you go Kratky), noise (zero), plant capacity (25 vs 18 in my builds), and it’s easier to access each plant for maintenance.
If you’ve got wall space → go shelf. If you’ve got a corner and want something that looks impressive when friends visit → go tower. Both work. Both grow plants. Both will make your family question your hobbies. Choose your fighter.
Indian Monsoon + Tower Setup
Since this tower is indoors, monsoon isn’t as big a deal as it would be for a balcony setup. But humidity — oh man. Mumbai/Kolkata/Chennai folks, listen up. Indoor humidity during monsoon can hit 80-90%, and that’s when fungal issues start. Leaves get spotted. Roots get slimy. Bad vibes all around.
What I do: run a small desk fan pointed at the tower for 4-5 hours a day during peak monsoon months. The airflow prevents fungal growth and also strengthens plant stems. And honestly the fan + the pump + the green tower in the corner — my room is basically a tiny biodome at this point. I’ve accepted it.
Also — check your reservoir water temperature regularly. If it crosses 28-30°C, root rot becomes likely. Frozen water bottle trick still works. I keep two small bottles in the freezer dedicated to this purpose. My roommate thinks I’m storing ice for cocktails. I haven’t corrected him.
One Month In — The Verdict
It’s been about a month since the tower went live and here’s where things stand:
- 16 out of 18 plants are alive and growing well. Two coriander plants at the bottom didn’t make it — not enough light even with the LED. Replaced them with more spring onions which don’t care about light apparently
- Harvested mint three times already. At this rate I’ll have enough mint to open a chutney business
- Lettuce is beautiful. Like actually beautiful. The leaves are curly and perfect and I feel a weird sense of pride every time I pick them for salad
- Zero pests so far. Indoors + no soil = no uninvited guests
- Total monthly running cost: ~₹150 (nutrients refill + electricity)
Would I recommend a tower over my other setups? For someone with limited floor space and who doesn’t mind a tiny bit of DIY work — absolutely yes. For a complete beginner who’s never done hydroponics? Maybe start with a simple Kratky setup first and graduate to this. There’s a pump involved, there’s plumbing, there are more things that can go wrong. It’s the intermediate level of hydroponic gaming.
Closing Thoughts
Five blogs. Five different setups. My apartment is genuinely starting to look like an urban farm at this point. I have plants in the balcony, the bedroom corner, on a shelf, and now a tower. My electricity bill has gone up by maybe ₹200/month total and I haven’t bought herbs from the market in months.
The tower is probably my favourite build aesthetically. There’s something about watching water trickle through a vertical pipe with plants spiralling around it that just feels… futuristic? Like I’m living in 2040 while my neighbours are still buying dhaniya for ₹30 a bunch. No judgement. Ok, slight judgement.
If you try building one, send me pictures. Seriously. I want to see other people’s towers. I want to compare. I want to feel validated in my choices. Is that too much to ask? Probably. Do it anyway.