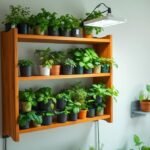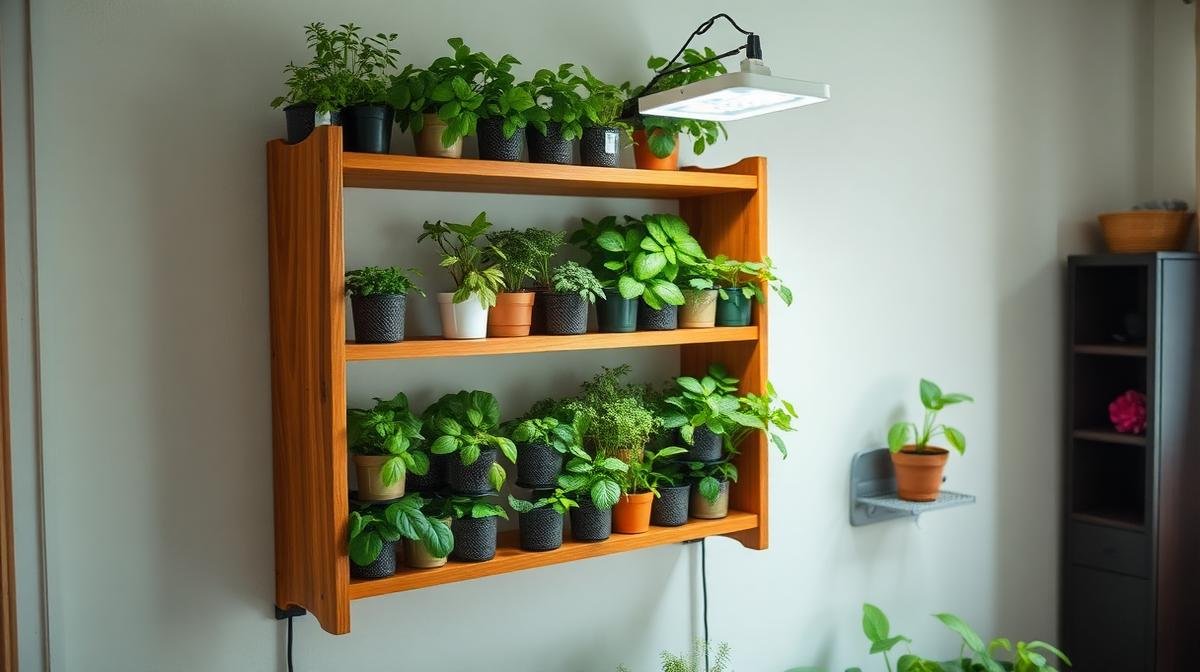
Ok so this is going to sound ridiculous but hear me out — I fit 25 plants. On ONE shelf. A single, normal, boring bookshelf that was previously holding dusty textbooks from my engineering days that I’m never going to open again. (Sorry Signals & Systems, you had to go.)
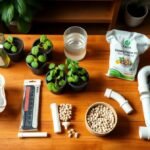
And before you ask — no, this isn’t one of those fancy vertical farming setups that cost ₹15,000 and require an engineering degree to assemble. This is pure desi jugaad. Some net pots, some recycled containers, a nutrient solution, and a lot of stubbornness.
The short answer? Hydroponics lets you stack plants vertically because there’s no soil taking up space. No soil = smaller containers = more plants per square foot. Simple math, honestly. I just… took it to a slightly obsessive level.
Why a Shelf Though? Like, Specifically a Shelf?
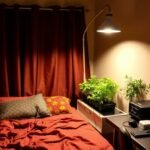
Look, I’ve been doing this hydroponic thing for a few months now. Started with a 2×2 ft balcony setup, then moved operations to my bedroom corner, then did the whole under-₹2000 budget challenge. But every single time, I kept running into the same problem — horizontal space.
Indian apartments are… generous in many ways. Square footage is not one of them. My entire living room is maybe 10×12 feet. My balcony is basically a glorified window sill. So when I wanted to scale up from 8-10 plants to something more serious, going horizontal was not an option.
Then one evening I was sitting there staring at my old bookshelf — you know the type, those cheap wooden ones from local furniture market, like 5 feet tall, 3 shelves — and it just clicked. Why am I thinking flat when I can think tall?
That shelf is 2 feet wide, 1 foot deep, and 5 feet tall. Three tiers. And I thought… what if I could fit 8-9 plants per tier?
Spoiler: I fit more than that.
The Maths Behind 25 Plants (Yes I Actually Counted)
Here’s the thing about hydroponics that soil gardeners don’t fully appreciate — you can grow plants in ridiculously small containers. A lettuce plant in soil needs a 6-inch pot minimum. In a Kratky hydroponic setup? A 2-inch net pot works perfectly fine. The roots dangle into the nutrient solution below, they don’t need all that extra room.
So I did the calculation:
Shelf width: 24 inches (60 cm)

Shelf depth: 12 inches (30 cm)

Net pot diameter: ~2 inches (5 cm)

Plants per row: 6 (with slight gaps for airflow)

Rows per tier: 1.5 → I used staggered placement for 2 rows

= ~9 plants per tier × 3 tiers = 27 possible slots
I ended up with 25 because two spots had airflow issues and I left those empty. Could have pushed to 27 but… plants need to breathe, yaar. I’m obsessive, not cruel.
What’s Actually Growing on This Shelf
Not all plants are equal when it comes to shelf growing. You need stuff that stays compact, doesn’t grow too tall (headroom between shelves is limited), and doesn’t mind being close to neighbours.
Here’s my exact lineup:
| Tier | Plants | Count |
| Top (most light) | Lettuce, Spinach, Pak Choi | 9 |
| Middle | Mint, Tulsi, Thai Basil, Coriander | 9 |
| Bottom (least light) | Spring Onions, Methi (fenugreek) | 7 |
The logic is simple — leafy greens that love light go on top, herbs that are somewhat tolerant go in the middle, and the real troopers (spring onions can grow in literal darkness, I’m convinced) go at the bottom.
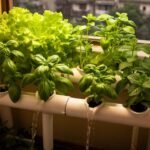
Coriander on the middle shelf was a gamble. Dhaniya is dramatic on a good day. But surprisingly? It’s doing okay. Not thriving like the mint — nothing thrives like mint, that plant is basically an invasive species — but it’s alive and giving me enough for garnishing dal every night. Small victories.
How I Actually Set This Up (Step by Step, No Fluff)
Alright, the practical bit. I’ll keep it tight because I know you’re probably already mentally mapping out your own shelf.
Step 1: The Shelf
Used my existing bookshelf. Any shelf works — metal racks from Amazon (₹1,500ish), IKEA-style ones, or even that old shoe rack you’ve been meaning to throw out. Just make sure each tier can hold some weight because water is heavy. A 3-tier shelf with 12-inch gaps between levels is ideal.
Step 2: The Containers
For each tier, I used flat, shallow plastic containers — the kind you get for storing clothes or kitchen stuff. Got mine from a local market for ₹80-100 each. Each container is basically a reservoir that holds the nutrient water. Drilled holes in the lids for the net pots to sit in.
Pro tip from someone who learned the hard way: use dark or opaque containers. Transparent ones let light through, and light + water + nutrients = algae party. Nobody wants that.
Step 3: Drilling the Holes
This part is weirdly therapeutic. Marked 8-9 circles on each lid using a 2-inch net pot as a stencil. Used a soldering iron to cut through the plastic — you could also use a heated knife or a hole saw drill bit if you’re fancy. I’m not fancy. Soldering iron it was.
I went with a staggered grid pattern rather than straight rows. Think of it like how you’d arrange oranges in a box — offset each row so they nestle into the gaps. This gives better spacing and fits one extra plant per row.
Step 4: Net Pots + Growing Medium
2-inch net pots from InHydro — ₹5 per pot if you buy in bulk. Filled them with a mix of cocopeat and clay pebbles (LECA). Could’ve used just cocopeat but the clay pebbles give better aeration to the roots and they look cool. Yes, aesthetics matter even in plant nersery.
Step 5: Nutrients & Water
Standard hydroponic AB solution. One bottle lasts 2-3 months for this scale. Mixed at 5ml each per litre of water. Filled each container about 70-80% so the solution touches the bottom of the net pots initially. As roots grow, you can lower the water level slightly.
I use RO water because my city tap water TDS is like 400+ and that messes with nutrient absorption. If your tap water is below 150 TDS, you’re probably fine without RO.
Step 6: Lighting
This was the trickiest part. The shelf is against a wall with a window nearby, so the top tier gets decent natural light. Middle and bottom? Not so much.
Solution: I mounted a cheap LED grow strip (₹350 from Amazon) under each shelf to light the tier below it. Running about 12-14 hours a day using a ₹200 timer plug. Total electricity cost? Maybe ₹80-100 per month extra on my bill. My landlord hasn’t noticed. (Kidding. Maybe.)
Total Cost? You’re Going to Like This.
| Item | Cost (₹) |
| Bookshelf (already had) | 0 |
| 3 plastic containers | 280 |
| 25 net pots (2-inch) | 125 |
| Cocopeat + LECA | 180 |
| AB nutrient solution | 350 |
| 3 LED grow strips | 1050 |
| Timer plug | 200 |
| Seeds (mixed pack) | 120 |
| Total | ₹2,305 |
If you already have a shelf and skip the timer plug, you’re looking at under ₹1,800. And this is for 25 plants. That’s like ₹72 per plant. My sabziwala charges more for a single bunch of mint lol.
Monthly recurring cost is just nutrients refill (~₹100) and electricity (~₹80-100). So roughly ₹200/month to keep 25 plants alive. The ROI on herbs alone — especially mint and tulsi which I was buying weekly — paid for the setup in about 6 weeks.
Things I Messed Up (So You Don’t Have To)
Wouldn’t be one of my blogs without the honest mistakes section. Here’s what went wrong:
Mistake #1: Overcrowding the bottom tier initially. I put 9 plants there like the other tiers. Bad idea. The bottom gets the least light AND the least airflow. Two lettuce seedlings just… gave up on life. Removed them, kept 7, everyone’s happier now. Sometimes less is more. Deep, I know.
Mistake #2: Not accounting for root growth. Week 1, everything looks neat and compact. Week 4? The mint roots are basically trying to escape the container and take over the entire shelf. Mint is… ambitious. I had to trim roots on a couple plants which felt weird, like giving a haircut to someone who didn’t ask for one. But it worked.
Mistake #3: Ignoring humidity. 25 plants transpiring in one area — the humidity around the shelf was insane. My wall behind the shelf started getting damp spots. Fixed it by placing a small USB fan (₹150) pointing at the shelf. Solved two problems: humidity and airflow for stronger stems. Shouldve done this from day 1.
Mistake #4: Forgetting to label stuff. This is embarassing but by week 3 I genuinely couldn’t tell apart some seedlings. “Is this spinach or lettuce? Is this basil or tulsi?” Ended up using small popsicle sticks as labels. Very professional, very high-tech.
Summer Mein Kaise Manage Kare? (The Heat Problem)
Indian summers and hydroponics have a complicated relationship. When ambient temperature crosses 35°C, water temperature rises too, and warm water holds less dissolved oxygen. Your roots suffocate. Plants wilt. You panic.
What I do: keep the shelf in the coolest room of the house (usually the one with AC or at least a ceiling fan). Top up water more frequently — evaporation doubles in summer. And this is important — I add water in the evening when it’s cooler, not in the afternoon when the water from my tank is basically lukewarm chai.
If you’re in a city like Delhi, Jaipur, or Nagpur where 42-45°C is normal in May-June… maybe pause the leafy greens for those 2 months and focus on hardy herbs only. Mint and tulsi can handle the heat. Lettuce? Lettuce will simply die out of protest. It’s dramatic like that.
Also — keeping water temperature below 26°C is the sweet spot. Frozen water bottles in the reservoir work if things get desperate. Jugaad, baby.
The 3-Month Update (Where Things Stand Now)
I’m writing this about 3 months into the shelf experiment and honestly? It’s the best hydroponic setup I’ve built so far. Better than the balcony. Better than the bedroom corner. The shelf just… makes sense.
Here’s the current harvest situation:
- Mint: Harvesting weekly. Can’t use it fast enough. Every guest gets mint chai whether they want it or not.
- Lettuce: Picking outer leaves every 4-5 days. Never buying salad greens from BigBasket again.
- Spring onions: Infinite. I cut them, they regrow. It’s the gift that keeps giving.
- Coriander: Slow and steady. Enough for daily garnishing but don’t expect huge bunches.
- Tulsi: Thriving. My mom is convinced it brings good energy to the house. I’m convinced it makes great tea.
- Methi: First batch was incredible. Already on round 2.
Total estimated savings on vegetables/herbs in 3 months: roughly ₹1,200-1,500. Not life-changing money, but the setup already paid for itself. Plus — and I can’t stress this enough — the satisfaction of walking to your shelf and picking fresh herbs for dinner? That’s not something you can put a price tag on. (Ok fine it’s ₹2,305, I literally just calculated it above.)
Should You Try This?
If you’ve got a shelf. Or can buy one. And you want fresh herbs without dedicating half your apartment to gardening. Then yes, absolutely.
This setup works especially well if you:
- Live in a 1BHK or studio apartment (been there)
- Don’t have a balcony or yours faces the wrong direction
- Want to grow a variety of plants without multiple separate setups
- Are already into hydroponics and want to scale without scaling your space
- Just really like the idea of a wall of green in your room (valid reason)
What I wouldn’t recommend: trying to grow fruiting plants on a shelf. Tomatoes, peppers, cucumbers — they need more vertical space, more light, and more root room than a shelf setup provides. Stick to leafy greens and herbs. That’s the sweet spot.
Final Thoughts (If You’re Still Reading This, We’re Friends Now)
Four blogs in and I keep finding new ways to shove plants into my apartment. At this point my flatmate has accepted that our home is slowly becoming a greenhouse. “Bhai, tu kitchen mein bhi lagayega kya?” Yes. Yes I will. That’s probably the next blog.
But seriously — the shelf method is the most space-efficient setup I’ve tried. 25 plants in 2 square feet of floor space. In a country where apartment sizes are shrinking every year, that matters. You don’t need a farmhouse. You don’t need a terrace. You need a shelf, some net pots, and the willingness to talk to your plants at 11pm. (Just me? Ok.)
Try it. Start with one tier even. See what happens. And when your mint starts taking over — because it will — remember I warned you.